Showing posts with label bf. Show all posts

Thursday, February 2, 2012

To-do List, Special Thanks, Best Posts

I'm going to wrap up Super Turbo coverage on this blog pretty soon. There are some things I'd like to post before then - in particular:

  • Contest!
  • Player Report Update
  • Videos from Japan Trip
  • Hajiki Screw with VIPER
  • Blanka Diagram
  • Miscellaneous Graphs
  • Secret Project JBH-1KG-FIG

Please look for those posts over the next few months. This blog may stay open after that with a bit of Morrigan fan art, some translated comics and possibly some Persona Ultimate news. We'll see.

Acknowledgements


Better late than never!?

NKI
I got back into ST after nearly 10 years away because of Nick. The way he played Chun-Li blew my mind. Also his enthusiasm and level-headedness online really inspired me.

Quick personal confession: I have a serious problem taking "yes" for an answer. If I agree with someone, but they're using a faulty premise or mixing up correlation with causation, I'm never satisfied. NKI always makes an effort to argue in good faith and I really appreciate it.

Tianyuan2k4
This guy encouraged me to start this blog in the first place. Also he uploaded most of the videos to the Superturbor account. Thank you, brother.

Harahi
People think I got started with Blanka by watching Komoda videos, but it was Harahi's web page that *cough* got the ball rolling: studying what he wrote, chatting about it with TY! and trying stuff out against NY players like FlashG, Doyle Bros and Shag.

Best Hits


Here are some of my favorite posts:

Muteki Interview
Even though it was just a stock Tougeki Spirits questionnaire, Mute Guile put a lot of thought into his answers. One of the best ST player interviews.

Emiko Iwasaki Interview
Fascinating look at the state of fighting games (before SF4 at least) — take a look at this even if you aren't interested in Battle Fantasia.

Haitani Interview
Short but insightful Q&A with one of the toughest multi-game players. Again highly recommended even if you don't follow the games Haitani plays.

Monday, June 2, 2008

Battle Fantasia Frame Data

The following charts list some frame data for the normal moves in Battle Fantasia. Also: start-up time for supers and guard advantage numbers for Face's sequential attacks.

The "Start-up" time is how long it takes for an attack to hit, i.e. how many frames of wind-up a given kick, punch or slash has before it strikes the opponent.

"Initiative" indicates which character gets to act first after an attack is blocked. Positive numbers mean the attacking character's recovery is shorter than the defending character's block stun and vice versa.

Where separate data for far C attacks are missing that means that a character has only one standing C move.

Numbers in parentheses are for attacks that have been fully charged.

Urs
AttackStart-upInitiative
Standing A5-2
Crouching A5-1
Standing B60
Crouching B71
Close C65
Far C111
Crouching C9-7
Standing D104
Crouching D8-8
→ + B19-6
→ + C26 (65)-14
↘ + D8-13
Ba-ku-o-n Roadmaster8
Basilisk Burst3

Marco
AttackStart-upInitiative
Standing A50
Crouching A6-1
Standing B63
Crouching B70
Close C55
Far C90
Crouching C8-11
Standing D100
Crouching D10-11
→ + B20-6
→ + C9-6
→ + D22-6
↙ + D7-4
Dyna Rush3
Final Strike4

Cedric
AttackStart-upInitiative
Standing A50
Crouching A5-3
Standing B63
Crouching B7-5
Close C113
Far C--
Crouching C8-8
Standing D15-3
Crouching D10-13
← + B177
→ + D34 (109)-16
Eternity of Regretmin 7

Ashley
AttackStart-upInitiative
Standing A51
Crouching A5-1
Standing B53
Crouching B5-5
Close C74
Far C--
Crouching C8-2
Standing D9-5
Crouching D7-6
→ + B19-1
↘ + D9-6
Secret Desire5
Royal Heart10

Olivia
AttackStart-upInitiative
Standing A51
Crouching A52
Standing B71
Crouching B5-7
Close C63
Far C7-7
Crouching C7-7
Standing D102
Crouching D10-4
→ + B17-6
→ + D21 (65)-7
↘ + D32-3
Eglanteria7
Centifolia4

Watson
AttackStart-upInitiative
Standing A5-3
Crouching A40
Standing B7-1
Crouching B52
Close C9-7
Far C--
Crouching C7-4
Standing D11-23
Crouching D8-10
→ + A200
Travasa Major26
Alsuhail Almuhlif5

Freed
AttackStart-upInitiative
Standing A51
Crouching A5-3
Standing B60
Crouching B6-3
Close C4-4
Far C8-5
Crouching C71
Standing D9-7
Crouching D11-13
Magnum Jet Landing12
Heat My Justice6

Coyori
AttackStart-upInitiative
Standing A62
Crouching A5-2
Standing B52
Crouching B5-7
Close C11-6
Far C--
Crouching C9-8
Standing D10-5
Crouching D7-11
→ + B21-1
Nekoneko Ranbu8
Neko Arashi4

Donvalve
AttackStart-upInitiative
Standing A91
Crouching A4-1
Standing B71
Crouching B6-3
Close C90
Far C14-10
Crouching C11-5
Standing D11-15
Crouching D26-11
→ + B16-4
→ + D16-4
Flying Don Cake3

Face
AttackStart-upInitiative
Standing A52
Crouching A50
Standing B7-2
Crouching B7-5
Close C72
Far C94
Crouching C71
Standing D110
Crouching D10-11
→ + C210
Wild Comeback (A)-4
Wild Comeback (C)-1
Frontier Shot (A)-4
Frontier Shot (C)-1
Middle Western (A)0
Middle Western (C)5
Grand Western (B)-4
Grand Western (D)-17
Kouya no Bazooka2
Ikari no Final Dillinger4

DeathBringer
AttackStart-upInitiative
Standing A64
Crouching A62
Standing B10-12
Crouching B7-7
Close C73
Far C16-12
Crouching C11-13
Standing D20 (80)-12 (0)
Crouching D19 (43)0 (6)
→ + D21 (62)0
Final Infernomin 36

Odile & Dokurod
AttackStart-upInitiative
Standing A51
Crouching A50
Standing B71
Crouching B5-5
Close C90
Far C--
Crouching C7-1
Standing D70
Crouching D9-6
→ + B17-6
Divertissement4
Grande Pirouettemin 1

Monday, March 3, 2008

Battle Fantasia Blowout

In this post I've got a slew of BattleFantaisa items: vids, Arcadia's tier list, tourney results and a developer interview. Console release in May!

I moved the earlier BF posts to the left sidebar. The official site moved here, btw. Watson and Charshu illustration by Emiko Iwasaki from the (now defunct) official blog.

Videos

This is a mix of tourney and casual action from Akihabara Leisure Land from this past winter. More videos like this here. (EDIT: and here.) Player names unknown. WMV ~20MB each.

Olivia vs. Freed
Cedric vs. Odile
DeathBringer vs. Marco
Urs vs. Face

Freed vs. Marco
Cedric vs. Donvalve
Coyori vs. Coyori
Freed vs. Watson
Urs vs. Watson
Cedric vs. Ashley

There are some newer matches from Leisure Land over here. Click "続きを読む" to expand each post for nico videos.

Character Rankings

This list as well as the notes come from Arcadia. They didn't have any copy for Freed, so I took a stab at that one. Also I moved Olivia from A-class to B-class and Coyori from S-class to A-class per online discussions.

Where there was complaining about character balance on the net, it was mostly about Cedric and his St. Drop Kick attack. Ced's position at the top wasn't reflected much in tournament results, however. I've included those below so you can see for yourself.

S Class
Cedric
Keeping his opponents pinned down with low-recovery projectiles is Cedric's speciality. His Holy Devotion hits very quickly, which makes it good for air defense or reversals. Although Cedric has some good pokes, he's got scant low attacks [especially if D is held down for St. Drop Kicks] so he's limited to normal throws if he wants to break his opponent's defense.

Ashley
Ashley's ability to turn a Gachi Drive into an infinite combo is a big weapon, but his basic abilities are strong to begin with. These include speedy jump attacks, command throws with decent range and various moves that leave his opponent open to follow-ups. His Heat Up can be used for a high/low mix-up plus big damage. Ashley doesn't have any invincible moves; lack of a quick reversal is one weak point.

A Class
Face
Face has fierce sequential attacks, plus the quick start-up for his Texas Knee and super moves give him an outstanding interrupt and anti-air ability. Quick start-up on the Kouya no Bazooka, in particular, makes it difficult to Gachi. If your opponent tries to stop the sequential attacks using Gachi, you can be in trouble, however. Mix up high/low and use feints [hold the button down during Wild Comeback and Frontier Shot] to baffle their counter attempts or you'll get killed by a couple Gachi Drive combos.

DeathBringer
DeathBringer's great range lets him keep is opponent at a distance. He's also got devastating combos off of Gachi Drive hits and good normal throw range. Up close, however, slow moves and a lack of invincible attacks means you'll have to struggle. Whether or not the opposing character can block and counter Death's pokes will change the match-up dramatically.

Donvalve
Good command throws and the huge far standing C are Don's primary weapons. Close C -> Flying Don Cake is a fierce anti-air combo. His crouching A is the fastest in the game. Donvalve was ranked at the top in the spring ('07), but he fell a bit as people became more adept at avoiding his command grabs.

Coyori
Multi-hit jump attacks, Uraban Cha mix-ups and big hit confirms off weak attacks put Coyori in the top tier [or not.] She lacks any mid range moves, however, and her constant assault is a big target for Gachi Match/Drive attempts.

Urs
Urs's excellent hit confirms and big combos plus his terrific counter attack ability give him a lot of stability. He has the potential to go head-to-head with the top tier group. On the other hand, Urs has few good mid range moves and his throw whiff animation is longer than the rest of the cast. Avoiding counters up close is key.

Freed
Freed can deal a huge amount of damage in a very short amount of time. Welcome Tempest is a very handy reversal move. Outside of Heat Up! trickery, however, he doesn't have many mix-ups beyond attack/throw. Predictable Magun Jetter attacks can get him in trouble vs. Gachi Drive, too.

Odile & Dokurod
Odile's strengths lie in multi-hit special moves, the cross-up dash and quick Petite Pirouette attacks from the air. She can be tough to Gachi or throw so she can really pin some characters down. Odile's damage off of Gachi combos is poor which means she's in trouble when they go on offense. It seems like her position on the ranks could fall as more research is conducted.

Marco
Although he has some standard attacks and a strong okiseme ability, Marco pokes and the low damage they get him, low health and a short jump arc mean he tends to get out-ranged. Since he has a wide variety of attacks, if you can close the gap you'll be in a strong position.

B Class
Olivia
Olivia's normal move pokes and angled jump attacks are both remarkable. She lacks mix-ups and it's tough to hit confirm unless you're very close. Combo damage is also meager so she's fallen into the bottom tier. If Olivia only had an invincible special move she'd probably be ranked higher.
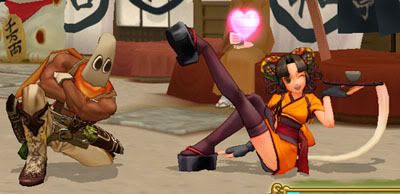
Watson
Leveling up can be arduous; plus lacking any worthwhile attacks beyond throw and jump C at level 1 makes things tough for Watson. Score a Gachi early in the fight to make things much easier.

Tourney Results

Hopefully this is self explanatory. Missing info is missing. Plus alpha: finals videos @ date.
EDIT: updated 7.23.08

Location info:
Akihabara Leisure Land Next one August 9th.
Ikebukuro GIGO
Shinjuku Club Sega
Pasopi Tokyo

Date

Location Entrants 1st Place 2nd Place
5/9/07 GIGO 8 Freed Olivia
5/19 Leisure Land 30 Rank (Face) HIT (DeathBringer)
6/2 Leisure Land 37 Rank (Face) Dendoshi (Face)
June GIGO 15 DeathBringer Freed
6/16 Club Sega 23 Cedric Face
6/17 Pasopi 5 Machida Don (Donvalve) Kimidori (Ashley)
7/4 GIGO 10 DeathBringer Urs
7/7 Leisure Land 22 Mammoth (Ashley) Machida Don (Donvalve)
7/14 Leisure Land
NDS (Cedric) & ? (Face) mizu (Face) & ? (DeathBringer)
7/15 Club Sega 10 NDS (Cedric) Tomono (Watson)
8/17 Club Sega
Rank (Face) & Delbard (Ashley)
8/18 Leisure Land 19 Rank (Face) Shigurudo (Odile)
Sept.
16 Gazu (DeathBringer) & Takana Sencho (Freed) KB (Cedric) & E (Urs)
10/13 Leisure Land 20 Tomono (Watson) Mammoth (Ashley)
11/10 Leisure Land 13 Across (Marco) Shigurudo (Odile)
11/10 Leisure Land 14 E (Urs) & EBI (Watson) Toki no Tobira (Ashley) & Delbard (Ashley)
12/22 Leisure Land 18 Gazu (DeathBringer) Tomono (Watson)
1/12/08 Leisure Land 24 Gazu (DeathBringer) Yagamo (Coyori)
2/16 Leisure Land 24 Rank (Face) Shigurudo (Odile)
3/15 Leisure Land 24 Rank (Face) Shigurudo (Odile)
4/19 Leisure Land 22 Kiruchin (Freed) Mogura (DeathBringer)
4/19 Leisure Land 18 Kiruchin & Eternal Force Blizzard Shindou & Takana Senchou
5/17 Leisure Land 22 Shigurudo (Odile) Rank (Olivia)
6/21 Leisure Land 24 Tomono (Watson) Gazu (DeathBringer)
7/19 Leisure Land 23 EBI (Watson) Rank (Face)


Developer Interview

Here is an excerpt from an interview with the developers that ran in Tougeki Spirits last summer. My translation came out pretty clunky, but you'll get the idea. Interesting window into not just BF's design but the state of fighting games in general here.

* Tachimawari, literally "moving around," is what you're doing in a fighting game when you aren't using some kind of set play (combos, mix-ups, etc.) It's broader than the english expression "poking," but in some contexts the two terms' meanings overlap: "that guy is good at poking" and "that guy is good at tachimawari" are fairly similar in spirit.

---

Initially, Emiko Iwasaki was hooked on some fantasy comics and wanted to try to bring those themes to an Arc System Works game. She came up with some character designs and, after they started talks with Taito vis a vis the Type X hardware, was asked to realize her creations in polygon form. The basic idea was to make a 2D fighting game that would appeal to a broad audience (i.e.: not just combo maniacs.)

Arcadia: What differentiates Battle Fantasia from other fighting games?

Takuro Kayumi (Main Programmer): We kept the speed under control. I guess the tempo is different.

Emiko Iwasaki (Director/Character Designer): Well, we wanted the focus to be on anticipation and tachimawari*. Once that was settled, it had to be slower. We'd like players to be able to concentrate on the spacing between them and their opponents.

Kayumi: There's a sense that all the games we [ASW] make are combo games, so we were going against that. We felt like outsiders in our own company. (laughs) Even in internal beta questionnaires we were told things like "these moves don't link" and "it's so simple"... we kept at it, mind you.

Iwasaki: Even the higher ups told us, "make it more like Guilty Gear." (laughs)

Kayumi: "Don't mess with the formula!"

Arcadia: As development progressed and you readied new versions, was there a corresponding change in reactions at the company?

Kayumi: Nah, the bottom line was, "isn't it a combo game?"

Iwasaki: A lot of people like Guilty Gear, after all, so there were a lot of Guilty Gear fans coming to work there. (laughs) We were kind of drifting along.

Kayumi: Guerilla warriors, you know? (laughs)

Iwasaki: But even people who mainly play Guilty Gear can see what we're trying to accomplish when they play this game. The young guys are like... "this is pointless," though. (laughs grimly)

Arcadia: What's the scoop on how the Heat Up System came into being?

Iwasaki: From the start, we were on track to make a pretty conservative game. But then we officially got the word to "make it more like Guilty Gear." (laughs) This was only half a year before we went gold. (laughs) Still, we didn't want to go against our original intent. At that point, the Heat Up system was born. If players were able to bust out flashy combos at any time that would wreck what we were trying to do. So now whether it's using super meter, or reading your opponent and landing a Gachi Drive, you aren't going to land a big (Heat Up) combo unless it's some sort of reward.

Kayumi: You know, people were saying "we want to land combos," so we tried to have it both ways by rewarding good anticipation with combo chances.

Iwasaki: I like combo games, too, but when complicated combos are coming at high speed there's a sense that you can lose without even knowing what's going on and this makes it tough for beginners. So instead of thrilling combos, we sought to focus on the fun of battling other people and that's how this game took shape.

[...farther down, with regard to what they'd like to do in future games...]

Iwasaki: I think that when you've got a situation where people who don't know each other are playing games and they're using anticipation and tachimawari, that's extremely fun. I want to continue to capture the fun of that style of play in the future.

crouching c vs. taunt

Friday, August 3, 2007

BattleFantasia Vids UPDATE

I scooped up some recent videos from Nico Video and re-upped:

http://www.zshare.net/download/2969313d2b6ea2/
(.flv x 4, 23MB)

unknown (Odile) vs. Machida Don (Donvalve)
Across (Marco) vs. Machida Don x3

UPDATE:

Here are a couple more:

http://www.zshare.net/download/2988939c427a6e/
(.flv x 2, 17MB)

E (Olivia) vs. Kiru (Freed)
Mogura (DeathBringer) vs. Kiru (Freed)

Sunday, July 1, 2007

BattleFantasia Vids 062707

G.X posted a bunch of BF videos. Tomono and Hex were both Fist of North Star rivals of his last year. All three of those guys pioneered a lot of techniques for that game.

http://blog.livedoor.jp/kuuronn/archives/64582362.html

Original files on filebank here.
Pass: fantasia

NDS (Cedric) vs. Kiru (Freed)
Tomono (Watson) vs. Kiru (Freed)
G.X (Ashley) vs. Kiru (Freed)
Tomono (Watson) vs. Hexamethylene (Cedric)
Tomono (Watson) vs. Ii [E] (Urs)
Tomono (Watson) vs. G.X
E (Face) vs. G.X
E (Face) vs. Kiru (Freed)
Tomono (Watson) vs. Kiru (Freed)
Tomono (Watson) vs. Mammoth (Ashley)
Tomono (Watson) vs. E (Face)
NDS (Cedric) vs. Kiru (Freed)

Friday, June 29, 2007

Pasopiard Battle Fantasia Vids 061707 bump

http://www.pasopi-tokyo.com/
Follow the "MOVIE" link on the left. Links to vids are on the right side of the first diagram as of today.

pasopicup_batfan_1.zip - Yagamo (Freed) vs. Machida Don (Donvalve)
pasopicup_batfan_2.zip - Kimidori (Ashley) vs. KB (Coyori)
pasopicup_batfan_3.zip - Ramune (Face) vs. Machida Don
pasopicup_batfan_4.zip - Kimidori (Ashley) vs. Yagamo (Freed)
pasopicup_batfan_5.zip - KB (Coyori) vs. Yagamo (Freed)
pasopicup_batfan_6.zip - Ramune (Face) vs. Kimidori (Ashley)

UPDATE:
The rest of the matches are up.
pasopicup_batfan_7.zip - KB (Coyori) vs. Machida Don
pasopicup_batfan_8.zip - Ramune (Face) vs. Yagamo (Freed)
pasopicup_batfan_9.zip - Ramune (Face) vs. KB (Coyori)
pasopicup_batfan_10.zip - Kimidori (Ashley) vs. Machida Don
pasopicup_batfan_11.zip - Finals: Kimidori vs. Machida Don


Elsewhere... there are a couple more casual matches from this same event (including the movies I linked to below) here.

Thursday, June 21, 2007

Battle Fantasia Scoop - Marco, Olivia, DeathBringer

Marco

Fighting at a distance
Use towards + C and projectile attacks for mid-range fighting. Cancel the towards+C into a Baribari Beam or Baribari Cutter to set the pace of the fight. If your opponent flinches, hit confirm towards+C into a heavy Jigoku Slash. Use towards+C -> Dokuhebi Crush to break their defenses.

Other useful attacks at this range include standing C and down+D. Marco's standing C is a high swing that can catch his opponents as they try to jump. It's particularly useful against larger enemies as it won't miss when they're crouching. Down+D is a sliding attack that goes underneath many incoming attacks and knocks down.

Up-close/Okiseme
Quick step and then a throw/crouching B two-way mix-up is the basic tactic at close range. Hit confirm the crouching B like so:
crouching B -> crouching B -> weak Jigoku Slash or Dyna Rush

If your opponent tries to throw you, Marco's towards+D leaping attack will avoid it and gives him a chance to juggle with a Final Strike when it hits.

When you've knocked your opponent down, a close C attack is a good choice in addition to the above mix-up. Marco gets the initiative when it's blocked, plus he can "no cancel" (i.e.: link) combo into a Dyna Rush. The close C can also be chained into a towards+B overhead.

Charshu Fire Loop
As you activate Heat Up, hit your opponent with crouching C -> crouching D then activate Charshu Fire. The input for this sequence looks like this:
down+B+C+D -> down+D -> down, down-towards, towards+A
What happens here is that you'll combo the first two attacks and then unleash the Charshu Fire as you're knocking your opponent down such that it will be right on top of them as they stand up. At this point, after they've blocked the fire for a moment, high jump over their head and you'll make it extremely difficult for them to continue blocking the dragon's breath. Now combo jumping D -> crouching C -> crouching D. Trigger another fire as you do the crouching D and you've got them in a loop.

It's possible to do three of these loops for huge damage. The Heat Up timer will run out on the fourth loop attempt.

Olivia

Basic Empress Lily Trickery
Empress Lily: in the air ↓↙← + B or D (hold)
Olivia dives at her opponent from above. If you aim for your opponent's shins you'll have the initiative when they block. Look for an attack/command throw mix-up here. If the Empress Lily hits, combo into a heavy Rote Rose attack (or Centifolia, if you're close enough.)

When you hold the button down, Olivia will fall without attacking and then immediately do a small hop. You can attack normally during this hop -- look for a big combo starting with jump C -- or do nothing and go for a throw as she lands.

Use the Empress Lily move to vary your air assault and confuse your opponent. If they're eager to use Gachi Match against your jump C, Empress Lily can throw off their timing. If you cancel a jumping D into Empress Lily and they try to Gachi Match -> Gachi Drive, hold the button down and tag them during the whiff. Etc.

DeathBringer

Saigo no Ichigeki Combos
Here are some combos that end with DeathBringer's special Heat Up attack. Brackets {} denote chains.
(near corner) Upper Gachi Drive -> Heat Up! -> high jump {A -> D} -> quick step A -> jump D -> {close C -> D} -> Saigo no Ichigeki

Lower Gachi Drive -> Heat Up! -> jump C -> {close C -> far C} -> crouching C -> Saigo no Ichigeki

Lower Gachi Drive -> Heat Up! -> high jump C -> {standing B -> D} -> {A -> D} -> Saigo no Ichigeki

Power Up then Mix Up
DeathBringer's Fundo no Sakebi power up move can be done safely after a throw or a heavy Shoujin no Semete attack. It's such a strong play that you may want to gamble with it when you see other opportunities, too.

When powered up, the Noroi no Gunba attack becomes extremely dangerous. DeathBringer has super armor and runs at his opponent very quickly. Catch them flinching and inflict big damage.

Powering up also makes DeathBringer's quick step much quicker. Since he's got the best normal throw range in the game, dash -> throw is an excellent play. Once you have a good sense of your throw range (a bit less than one of Death's boot lengths) step just close enough so that you can throw but not be thrown to menace your opponent. Crouching B can also be used at this range for a two-way mix-up. Hit confirm the kick into a Yaketsuku Tsumeato. If you're very close you can hit confirm crouching B into a Shoujin to Semete.

Another choice when you've dashed into close range is a close C attack. This will beat low Gachi Match attempts (maybe they're hoping to tag your crouching B) and gives DeathBringer the initiative when it's blocked. Chain the close C into towards + D or link crouching B for a high-low mix-up. Or take a half step forward and throw or use a Shoujin no Semete to try to catch them jumping.

Sunday, June 17, 2007

Battle Fantasia Vids 061707 update

Somebody posted some BF videos on Nico Nico Video. These are casual games; I think some tourney matches might be forthcoming.
One, Two, Three

I downloaded the flash files and re-upped here. You'll need an .flv player.

Kimidori (Ashley) vs. unknown (Freed)
unknown (Freed) vs. Machida Don (Donvalve)
Machida Don (Donvalve) vs. KB (Coyori)

UPDATE:

One more re-upped here.

KB (Cedric ) vs. Ramune (Coyori)

BTW, it seems like VLC can play .flv files. link

Wednesday, June 6, 2007

Battle Fantasia - Comic Scanlation 2

BattleFantasia made the cover of Arcadia this month. Art by Emiko Iwasaki.

Click to enlarge.

Saturday, May 26, 2007

BF Vids 052407

New Battle Fantasia match videos @ Kijou no Kuuron.

http://blog.livedoor.jp/kuuronn/archives/54296155.html

The original files are on filebank here.
Pass: fantasia

OGU (Coyori) vs. Shiru (DeathBringer)
OGU vs. G.X (Ashley)
Puuro (Face) vs. G.X
Shiru vs. G.X
OGU vs. G.X
Shiru vs. G.X

Wednesday, May 16, 2007

BattleFantasia Setting Documents

These scans of the early character designs for Battle Fantasia are from the May issue of Arcadia. I've translated or paraphrased some of the designer's comments, too.

The voice actors for each character are listed below. If you punch the names into Google, you can see what else that person has done. Emiko Iwasaki, the voice of Marco, is the director of BF itself. She also did these illustrations as well as illustration work for some of the more recent Guilty Gear games. The man who voiced Freed, Daisuke Ishiwatari, is the father of Guilty Gear. He did the game's original design, illustrations and music; plus he's the voice of Sol Badguy.

Free Image Hosting at www.ImageShack.us
Click to enlarge.

Urs
VA: Hidemi Anzai

Towards the end of development, I was in a tight spot where I needed an adult version of Marco to be the hero. Urs came along to bust up the schedule, the planning, the beta test and the budget. That's just like him, I guess. At any rate, I'm glad it's over.

Free Image Hosting at www.ImageShack.us

Marco
VA: Emiko Iwasaki

The concept here was to make a boy with a whiff of the Showa era*. Back when he was the hero, I wanted him to be more manly; but in order to differentiate him from Urs I made him increasingly silly. Charshu ["roast pork," the dragon] was a nickname that the staff came up with spontaneously.

[* - The period in Japan from 1926 to 1989. "Whiff of the Showa" i.e., "Retro."]

Olivia
VA: Masako Ookouchi

Olivia is like a maiden from an old-school girls' comic. I used my experience in the color guard as a base for her movements and the flag design. Some of her moves can be done in real life, so if you cosplay her please give them a try.

Free Image Hosting at www.ImageShack.us

Ashley
VA: Hiroaki Miura

The concept for this character was male sexiness. I gave special attention to his handsome silhouette. Although he has a lot of tricks for snatching men and women, he's actually a mysterious man looking out for the princess like a character in a girls' comic.

Upper right: "Your voice is just like chocolate..."

Cedric
VA: Daisuke Sakaguchi

Cedric was initially designed to be a timid boy who grows stronger as he's dragged along with Marco. It turns out that we had too many runts, so his body was made bigger, and a high school student in breeches was born.

Free Image Hosting at www.ImageShack.us

Watson
VA: Katsue Miwa

BF's mascot character! My tastes are no secret, huh? He was quite unpopular during development, so I had to push for him by myself like Juliet with Romeo. He may be frail, but we strove to design him so that he can be very strong if you work at it.

Face
VA: Takahiro Fujimoto

I wanted to design a two fisted gunman -- the coolest character in history! When we started modeling, however, he got a Bazooka. Then he started saying, "Texas!" and he became a more boisterous character.

Head poses -- clockwise from left:
Metronome, Blasting, Too Bad, Taunt, "Normal move air defense?", "The texture stretches, too", Time Out, Got Hit

Free Image Hosting at www.ImageShack.us

Coyori
VA: Umeka Shouji

Because tension amongst the male staff members was high, it's not so much that I created Coyori as she came out on her own. Anyhow, I worked furiously on polishing the panty shots. It would have been nice if I had prepared more cute Japanese-style variations.

Donvalve
VA: Naoki Tatsuta

"I want to make his belly jiggle!" With that in mind, this character was made. We added some steam locomotive and robotic gimmicks to the model, but these don't come across very well on the screen.

Free Image Hosting at www.ImageShack.us

Freed
VA: Daisuke Ishiwatari

A captain who travels the skies. Since he has a hook, people mistakenly think that Freed is a pirate. I used the image of a good Latin man, so the model's face turned out dark and handsome. Once Mr. Ishiwatari did the voice, the character really tightened up.

DeathBringer
VA: Naoki Imamura

This character was designed in the image of an RPG final boss. If I had had more time I would have liked to research the depiction of the flame mantle more. As development progressed he had fewer and fewer flames, and his rear end was left uncovered...

Sunday, May 13, 2007

BF Vids 050407

G.X posted some more BattleFantasia matches.

http://blog.livedoor.jp/kuuronn/archives/54134052.html

The original files are on filebank here.
Pass: fantasia

G.X (Ashley) vs. Hev (Coyori)
Puuro (DeathBringer) vs. Hev
OGU (Watson) vs. Hev
Setsuna (Cedric) vs. Hev
G.X vs. Hev
Puuro vs. Hev
OGU (Coyori) vs. Hev

Sunday, May 6, 2007

Battle Fantasia Scoop - System, Urs, Cedric

Here's some more basic BattleFantasia information. This time I've mixed together Arcadia strategy with items picked up on the 'net. The fan art section probably won't be a regular thing... I just thought it was neat how people on the BBS whipped up such interesting drawings.

Fan Art Roundup

Click to enlarge.

Kajima at Arcadia Frontiers:


Mizuki at this page:


Various anonymous BBS contributors:


"Close your eyes..."

System

Upper Gachi Drive and Juggle Limitations
To use an upper Gachi Drive attack press towards + G to meet your enemy's high/mid attack. Your character will do a counter attack that blasts their opponent against the wall. Since this attack isn't invincible, it doesn't work against multi-hit attacks. Note, however, that you can use Gachi Drive in conjunction with Gachi Match. For example, if Coyori attacks with her three-hit jumping D mop strike use:
Gachi Match -> Gachi Match -> Gachi Drive
to nail her with an upper Gachi Drive.

Having connected with an upper Gachi Drive you'll have a big opportunity to use some kind of juggle combo. In any juggle situation there is a limit to how many attacks you can use. Repeating attacks will cause you to reach this limit more quickly. When your opponent's portrait is red that means they are still vulnerable to juggle attacks. Once it turns blue you won't be able to combo them any further.

Attack Sets and Lower Gachi Drive
Chain combos -- where you cancel one normal attack into another -- in this game are called "Attack Sets." These are analogous to Target Combos in Street Fighter III in that each character has a unique set of Sets, as it were. I'll add Attack Sets to the next version of the move list.

When you successfully meet a low attack with a Gachi Drive, the chain combo limitations are relaxed and most characters can chain A -> B -> C -> D. I think you can tell when this is possible if your opponent has a gold trail behind them.

Okiseme Command Throw Trap
After being knocked down, you can be thrown right away when you stand up. People are saying that you can't back step or even jump to avoid being thrown. This is particularly troublesome for Face since he doesn't have any invincible (or at least immediately un-throwable) special moves. Wake-up Bazooka works, though.

Heat Up! Activation Plus Alpha
It's possible to simultaneously activate Heat Up! and attack by inputting the corresponding commands all at once.
For example, from a normal state, Ashley can immediately do a Romance Wing attack by doing: down, down-forward, forward + A + C + D
Likewise, from a normal state Face can do the Heat Up! version of his far D (it sends his opponent flying?) with A + C + D.

Last Boss
The final CPU opponent, "Shin" DeathBringer, starts out with 30,000 Hit Points! He also has a super countdown attack reminiscent of Bahamut's from Final Fantasy. It's possible to damage him normally (percentage-wise) while in Heat Up mode -- charge your meter with throws and Gachi Matches and then use it to defeat him.

Urs

Combo Basics
The A Barify Shot gives Urs excellent initiative. When it hits you'll have time to quick step in and combo off of it like so:

A Barify Shot -> quick step -> close C -> C Barify Blade -> Ba-ku-o-n Roadmaster

Hit confirm crouching B x2 into a Roadmaster super. If you're very close, you can combo the crouching kicks into a Barify Blade. For something more exotic try this one:

croching B x2 -> crouching B kara cancel Onsoku Tackle
(2B -> 2B -> 2B~36D)

A 2ch poster uploaded a video of this. Re-upped here. The first attempt is without the kara cancel. The second is with it.

Here's Arcadia's first upper Gachi Drive combo for Urs:
Gachi Drive -> (back step) -> Heat Up! -> Zero Yon Glide x3 -> Barify Blade

Cedric

Which Finger for Holding D?
Cedric's St. Drop Kick has four levels of power. Hold the D button down a few seconds for level one, then a few seconds more for levels two and three. The button must be held for much longer (most of the round, it seems) to reach level four. Here are the effects:

Level 1: regular hit
Level 2: knock down
Level 3: juggle opportunity
Level 4: juggle opportunity + huge damage

You can combo the St. Drop Kick in a variety of situations, including after a throw: Throw -> Level 4 Drop Kick -> D Holy Devotion does enormous damage.

Monday, April 30, 2007

BF Vids 042907

G.X (Hokuto no Ken Raoh master) has posted some Battle Fantasia match videos on his blog:
http://blog.livedoor.jp/kuuronn/archives/53949898.html

OGU (Watson) vs. Hev (Coyori)
G.X (Ashley) vs. Hev
G.X vs. Setsuna (Cedric)

Original files on filebank here.
password: fantasia
Filebank quick-start graphic. Time for a new graphic...

I'm planning on posting some BF scoop from Japanese BBSs soon. The players' first impressions have been mostly positive. Hat tip: tianyuan2k4.

Thursday, April 26, 2007

Battle Fantasia - Introductory Strategy Part 2

Coyori

Coyori's specialty is getting in close with her air dash and then using sequential special moves for combos or mix-ups. Ocha Dashi -> Ichiban Cha -> Niban Cha combos off of crouching B and it's relatively safe when blocked. Pin your opponent down and then break their defenses with a Bon Gaeshi/Fukabori Cha high/low mix-up.

Uraban Cha: after Ocha Dashi or Ichiban Cha, B
Sneak around your opponent and kick them from behind. Hold the button down and Coyori will move without attacking.

Neko Arashi: ↓↘→↓↘→ + B or D
Shinryuken! Multi-hit anti-air super move. Mash for extra hits.

Heat Up!
During Heat Up, Coyori gains access to new combo routes -- that is, she can use more chain combos. Some of her moves can be jump cancelled, her air dash gets faster and she can double jump, too. Master her Heat Up-specific combinations to inflict huge damage!

Face

Although he's a gunslinger, Face specializes in fighting up close. Cancel a crouching B into a weak Frontier Shot. When this hits, super cancel into a straight Kouya no Bazoooka; otherwise look for a mix-up with the Middle and Grand Western attacks.

Wild Comeback: ↓↙← + A or C
Face moves away from his opponent and then charges in. Hold the button down to cancel the attack.

Texas Knee: →↓↘ + B
2nd Texas Knee: →↓↘ + D
While lacking invincibility, these climbing attacks come out very quickly. It's possible to juggle with Texas -> 2nd Texas or Texas -> diagonal Bazooka.

Heat Up!
This is Face's chance to become a true gunman! During Heat Up, he can fire six quick shot attacks that quickly travel the entire length of the screen. Catch your opponent flinching at a distance -- or use a low/overhead quick shot mix-up -- and then continue to juggle with further quick shots. If you have a second super ready, you can finish the combo with a Kouya no Bazooka blast.

Donvalve

The quintessential "big guy," Donvalve's goal is to get close to his opponent and catch them with a command throw. He can't quick step forward, so you'll want to jump in (or high jump) with C or an air Gachi Match to get close. The Catapult Hammer and Catapult Throw moves make Donvalve charge towards his opponent while ignoring their attacks (he'll still take damage.) Far standing C has excellent reach and enough priority to discourage your opponent from jumping.

Don Swing: joystick 360 + A or C
Command throw. The weak version has good range while the heavy version does more damage.

Flying Don Cake: ↓↘→↓↘→ + B or D
Donvalve grabs his opponent out of the air. Use this to catch your them if you think they'll jump away to avoid being thrown or use it after an anti-air Gachi Match.

Heat Up!
Donvalve's walking speed increases and he gains super armor. In addition, he can throw his opponent with a simple towards + C input. Take advantage of Donvalve's large number of Hit Points to plow through your enemy's attacks and grab them.

Freed

With various charging attacks and long ranged normals that do big damage, Freed is a heavy hitter. His quick step and jump are both very speedy, so he can easily avoid fireballs and pokes to close in on his opponents. Crouching C has excellent range and can be cancelled into the Phantom Dive and Phantom Glide attacks for a high-low mix up at medium range.

Magnum Jetter: ← hold, → + A or C
This charging attack misses most crouching characters, but it recovers very quickly, so it's possible for Freed to do weak Jetter (whiff) -> throw.

Heat My Justice: ↓↘→↓↘→ + B or D
Freed attacks his opponent with an uppercut. When that hits, he follows up with a giant blast.

Heat Up!
After activating Heat Up mode, Freed gains an afterimage that attacks in conjunction with his charging special moves. For weak attacks, the afterimage will combo after Freed hits. With strong attacks, the second hit arrives a bit later and can be employed to pin Freed's opponent down. In the case of his Phantom Dive and Phantom Glide attacks, note that the afterimage attack doesn't count as an overhead/low attack.

Watson

A cute bunny with stellar constellation themed attacks, Watson's special moves are very weak to begin with. He can "Level Up" these moves by connecting with various C attacks. At level 3, Watson's special moves become strong enough that he can pin his opponent down by using them repeatedly. Since he has very little stamina, it's important for the Watson player to be patient and precise with his attacks.

Platinum Ball: ↓↘→ + A or C
Watson throws a glyph that lingers in front of him for a moment before it flies at his opponent.

Travasa Minor: ↓↘→ + B or D
A constellation on the ground traps Watson's opponent. At level three he can easily connect with a follow-up attack in any situation.

Heat Up!
After you perform the incantation three times, a meteor shower will rain down on the battlefield. Use (powered-up) Platinum Ball attacks to provide cover while you finish the spell.

DeathBringer

DeathBringer uses his giant sword to deliver crushing blows from a distance. His far C, in particular, has incredible range. Use it to poke or to discourage your opponent from jumping. Crouching C and vertical jump D are also excellent long-range attacks. Take advantage of a big gap by using the Fundo no Sakebi move to power up DeathBringer's special moves. At somewhat closer range, mix-up the towards + D overhead with a low crouching B -> Yaketsuku Tsumeato combo to break your opponent's defense.

Yaketsuku Tsumeato: →↓↘ + A or C
Although this looks like a big anti-air attack, it doesn't have any invincibility: save it for combinations. Hits three times when powered up.

Noroi no Gunba: →↘↓↙← + A or C
DeathBringer does a nasty charging attack. When powered up, he does an additional climbing strike at the end.

Heat Up!
If you can connect with three slash attacks during one Heat Up, DeathBringer will attack his opponent with a giant flaming sword. More research needs to be done on multi-slash combos, but landing an upper Gachi Drive is a good place to start.

Friday, April 20, 2007

Battle Fantasia - Introductory Strategy Part 1

Here are some points from Arcadia's basic rundown of the Battle Fantasia cast. Listed below is only a sampling of special moves -- please take a look at the file that I recently posted on GameFaqs for a more complete list.

Urs

With a standard complement of fireball, anti-air and charging attacks, Urs is easy to pick up and play. His normal attacks have good range and are likewise easy to grasp. Far standing C, in particular, is good for poking and catching your opponent as they try to jump. It can be cancelled, too.

Barify Shot: ↓↘→ + A or C
Projectile attack. The A version doesn't have much range, but Urs has the initiative when his opponent blocks it.

Barify Blade: →↓↘ + A or C
Shoryuken! How difficult will it be to use Gachi Match against this multi-hit anti-air move?

Ba-ku-o-n Roadmaster: ↓↘→↓↘→ + A or C
Urs quickly rushes towards his opponent a fair distance. Good for combos and counter attacks.

Heat Up!
Certain special moves get powered up. Some become able to knock Urs's opponent off their feet, others do extra hits, etc. Zero Yon Glide becomes a big combo tool. Use it after an upper Gachi Drive and then continue to juggle with the powered-up Barify Blade.

Marco

Marco also has some standard Shotokan-style fireball and dragon punch special moves. His floaty jump means that air combat isn't his speciality but he has a quick dash and a good up-close game. Hit confirm rapid fire crouching B into a Jigoku Slash. Poke with towards + C at medium range.

Dokuhebi Crush: ↓↙← + B or D
Leaping overhead attack. Hold the button down and Marco will hop forward without attacking.

Final Strike: ↓↘→↓↘→ + B or D
Marco holds his sword up and blasts his opponent. Good invincibility for anti-air and interrupting your opponent's attacks.

Heat Up!
Marco summons the dragon Charshu. Make your opponent block the multi-hit Charshu Fire attack and look for a high-low mix-up.

Olivia

Using a flag as a weapon, Olivia's various C attacks have excellent range. Her jump attacks are particularly dangerous. Mix these up with the Empress Lily special move to throw off your opponent's anti-air Gachi Match timing. D attacks leave flowers behind.

Dainty Libby: ↓↘→ + A or C
This charging attack has some recovery time so it's useful mostly for combos. Cancel her crouching C into a Dainty Libby for a good mid-range combo.

Shall we dance? →↘↓↙← + A or C
This command throw inflicts only one hit point of damage, but it's possible to land a follow-up attack.

Heat Up!
Olivia summons four doves that peck in conjunction with her attacks. These extra hits go with all of her moves, from normals to supers. Break your opponent's defense with the towards + B overhead and then proceed to combo into Dainty Libby -> Centifolia for big damage.

Ashley

Closing in on his opponent with quick jumps and rushing special moves and then using an attack/command throw mix-up is Ashley's game. Jumping D has excellent priority down and to the front and jumping B stays out for a long time. Do down + C in the air and Ashley will float for a moment; use this to disrupt Gachi Match attempts.

Glance Wing: ↓↘→ + A or C
Ashley flies straight ahead. This move has a sizable recovery so save it for hit confirming and counter attacks.

Judas Wing: →↓↘ + B or D
Ashley leaps up and attacks his opponent at a downward angle. As long as you aim for your opponent's legs you should be pretty safe when it's blocked.

Steal You: →↘↓↙← + A or C
Command throw with decent range.

Heat Up!
Activate Heat Up! and Ashley gains access to the Romance Wing special moves. These look similar to his Glance Wing but differ in that he can cancel one charging attack into a different one. It's possible to combo your opponent all over the screen. One way to set this up is to connect with an upper Gachi Drive, start Heat Up! and then immediately juggle with a Romance Wing.

Cedric

A classic charge character, Cedric can use his fireball to keep his opponent at a distance, or he can throw one and then approach behind it. It's possible to get closer to your opponent while maintaining a charge by using back + B. In a similar fashion as Third Strike's Remy, Cedric can launch with crouching C and then juggle with a Holy Devotion (Flash Kick) attack.

Evangelical: ← hold, → + A or C
Sonic Boom! Projectile attack with very short recovery.

St. Drop Kick: hold D, then release
Kick gets stronger the longer you hold the button down.

Hammer of the Gods: ↓↘→↓↘→ + B or D
After starting this move, if Cedric's opponent attacks he'll trap them in a giant bell and hit it repeatedly.

Heat Up!
Cedric powers up his special moves. Most importantly, his Evangelical attack throws two projectiles that travel at different speeds. Chase in behind them and use a towards + D overhead or some other mix-up variation.